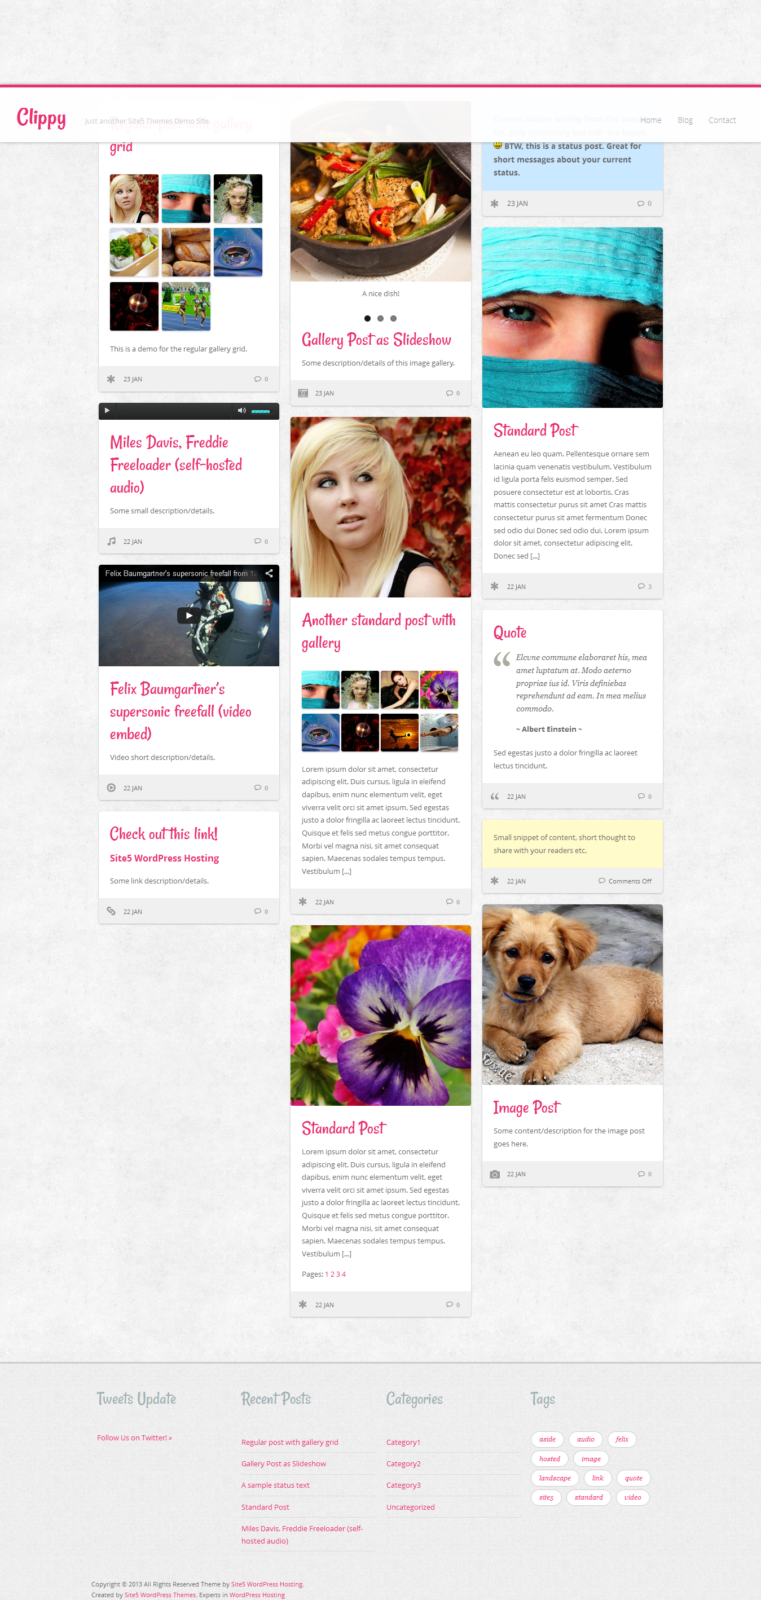
Clippy is free wordpress template. Clippy wordpress theme is very good for Blog, Clean, Elegant, Fashion, Food, Girls, Modern, Personal, Photography, Simple websites. Clippy have some features like Built-in Contact Form, Built-in Widgets, Clean typography, Cross Browser Ready, Custom Menus, Custom Widgets, Footer Widget, Grid View Layout, HTML5 and CSS3, Localization Ready, Modern layout, Responsive Design, Theme Options Panel, WordPress 3.0+. You can download Clippy at WordPress Templates Gallery.

Clippy Documentation
A setup guide and general information to help you get the most out of your new theme.
This document covers the installation, set up, and use of this theme and provides answers and solutions to common problems and issues. We encourage you to read this document thoroughly if you are experiencing any difficulties.
Theme Demo: http://demo.s5themes.com/?theme=clippy
Theme Page: http://www.s5themes.com/theme/clippy
Set-up guide and general information.
1. Getting Started
To install this theme, you must have a working version of WordPress already installed. For information in regard to installing the WordPress platform, please see the WordPress Codex – http://codex.wordpress.org/Installing_WordPress
When you are ready to install a theme, you must first upload the theme files and then activate the theme itself. The theme files can be uploaded in two ways:
- FTP Upload: Using your FTP program, upload the unzipped theme folder into the /wp-content/themes/ directory on your server.
- WordPress Upload: Navigate to Appearance > Add New Themes > Upload. Go to browse, and select the zipped theme file. Click “Install Now” and the theme will be uploaded and installed..
Once the theme is uploaded, you need to activate it. Go to Appearance > Themes and activate your chosen theme.
Once activated, a new menu item will appear on the left admin menu named “Theme Options“. It’s important to click that menu item and “Save” the default options.
2. Theme Features
This theme was designed with simplicity in mind, so setting it up should be a pretty straight &forward process for everybody.
The theme comes with features that you can control easily via our user-friendly theme admin panel. You can find these features below:
- Widget ready (sidebar)
- Custom Post Formats
- Easy to setup, Theme Options Page
- Custom Logo and Favicon supported
- Typography, Google Web Fonts supported
- Built-in Pagination
- Simple SEO
- Stats code supported
- jQuery PrettyPhoto Lightbox
- Custom Menu
3.Custom Post Formats
This theme supports different post formats used to customize the content presentation of posts. You can choose the post format on the Add New post page from the right hand side panel.
Available post formats:
- Standard post
- Aside post
- Gallery post
- Image post
- Link post
- Quote post
- Video post
- Audio post
Choosing a post format will differentiate posts with the help of the custom icons displayed on the left side of the post title as you can see on the theme demo.
The Audio Post format allows you to post self-hosted or external url audio files. Once selected, specific fields will be available on editing area for audio file url and a cover photo. You can still add text in the editor as a description..
4. Custom Menu
While the theme includes one custom menu location, you can also create custom menus for use within the custom menu widget.
To set up your custom menus, navigate to Appearance > Menus.
Give your menu a name and build it up using the available widgets. You can add a variety of items including pages, categories, and custom links. To extend the available widgets, click the screen options tab at the very top of the screen and configure your options. Once you have built your menu, save it, and use it on the Main Menu location or within a custom menu widget Appearance > Widgets
5. Theme Options
The theme comes with an easy-to-use administration panel. You can access it by navigating to Admin > Theme Options. The theme options are conveniently spread over a number of tabs and each tab contains the options that pertain to a particular area of the theme.
5.1 General
You can upload your own logo to use along with a text title, like on the theme demo, or enable only image logo to be displayed. If you choose to have only a text logo simply don’t upload any image at all.
5.2 Homepage
You can choose how may articles to display on the homepage.
5.3 Colors
There are different options available for you for color settings. You can set up the headings colors.
5.4 Typography
If you check Enable Google Font and provide the right Google Font Link and Font-Family, the heading’s font will be replaced with the custom one.
5.5 Contact
Set up your email address to be used on the contact link, on the sidebar.
5.6 Meta
This section is made to help you with a few SEO settings. If you have a dedicated plugin for SEO, just uncheck the option on the page.
5.7 Footer
The content filled in this textarea will be displayed as the copyright text on the website’s footer.
5.8 Stats
This textarea is reserved for code offered by third parties (Google Analytics) that will help you track traffic on your website.
5.9 Thumbnails
After installing the theme for the first time, you must regenerate the image thumbnails in order to match the theme thumbnail sizes. This process can take a while, so don’t close the page until the process is completed.
6. PrettyPhoto Lightbox
For image and gallery post fomats the lightbox on images link is enabled by default.
If you want to use lightbox on an image in a standard post, for example, you need to add class=”prettyPhoto” to the image Link Class.