


Theme Features
Oversized Details:
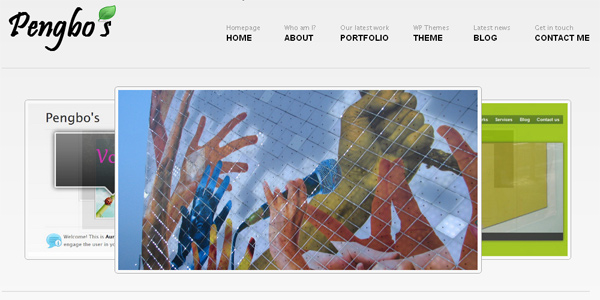
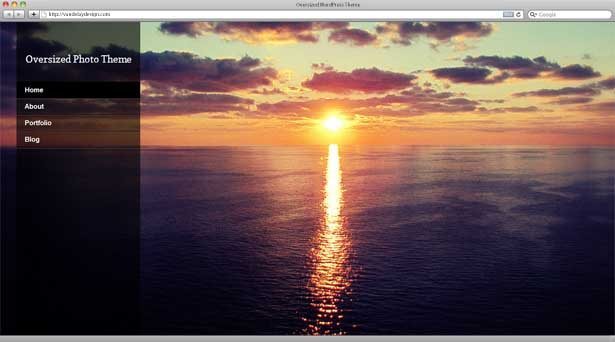
Oversized is a free WordPress theme for photographers that uses a full-size background image for a dramatic effect. The full-screen image slideshow is perfect for showing off your best work.
Theme features include:
- Customizable jQuery full-screen slideshow
- Portfolio page template
- Upload photos and create your own custom galleries
- Upload your own logo, or just display the site title in text
Oversized is perfect for allowing your photos to speak for your quality of work. With the high-resolution background slideshow your visitors won’t be able to miss your best photos. You can choose the transition effect for the slideshow. You can also create as many custom photo galleries as you like, and all of the photos in those galleries will be shown on your portfolio page.
Additional Screenshots:
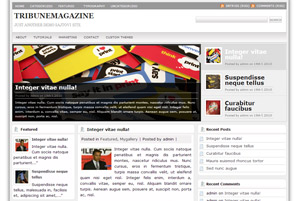
Portfolio page

Blog post

General WordPress Documentation:
There are a few WordPress settings that we recommend changing or at least checking to make sure they are accurate.
Site Name
From the WordPress dashboard (which will be located at http://yoursite.com/wp-admin/) click on “Settings” in the left sidebar.

Under the “General Settings” you can enter your church’s name in the “Site Title” field, and if you’d like you can enter a tagline in the “Tagline” field.

Time
Lower on the same page (General Settings) you can set your time zone. It’s usually easiest to select a city in your timezone.

When you are done making changes, click on the “Save Changes” button at the bottom.
Permalinks
Another change that we recommend is for the permalink settings. (Click on “Permalinks” under “Settings” in the left sidebar of the WordPress dashboard.) The permalink is the URL of a page or post created on your site. By default WordPress will give your page a permalink like http://yoursite.com/?=p123. That is not ideal for search engine rankings or for being helpful for your visitors. We recommend checking the box for “Post name”. This will give your pages URLs like http://yoursite.com/about-us/. That is much better for both search engines and human visitors.

Click the “Save Changes” button when you are done editing the permalinks settings.
Visibility
You’ll also want to make sure that your site will be accessible to search engine users. From the WordPress dashboard click on “Settings” and “Privacy” in the left sidebar. Then make sure the box is checked to allow the site to be visible to everyone.

Click the “Save Changes” button when you are done editing the visibility settings.
Widgets
WordPress themes use things called widgets to allow users to control certain, including the contents of a sidebar. Some of our themes use widgets and some don’t. When you first install WordPress it comes with a default theme, and the sidebar will look something like this:

All you have to do to change the widgets is go to “Appearance” in left sidebar of the WordPress dashboard, and then click on “widgets”.

If you look to the right side of the screen you’ll see a list of widgets under “Main Sidebar”. To remove any of the widgets, move you mouse over one of the listed widgets, left click (and hold the left mouse button) and drag the widget to somewhere in the middle of the screen, then release the mouse button.

Also please see:
Documentation for the Oversized WordPress Photography Theme:
This documentation will take you through the steps of setting up your site using the Oversized WordPress Photography Theme.
Setting Up the Pages
From the WordPress dashboard click on “pages” in the left sidebar.

Then click on “add new”.

Title the page “Home” and under “Page Attributes” select “Home” as the template. No content/text needs to be added to this page. Then click “publish” when you are done.

Then click “add new” again and add a page titled “Blog”. No content/text needs to be added to this page. Click publish when you are done.

Then click on “pages” in the left sidebar again. This will list the 2 pages that you have created plus a sample page that comes by default with your WordPress installation. Since you don’t need the sample page, click “trash” under the title (you will need to hover your mouse over the title to bring up the “trash” link).

The last page we’ll add for now is the portfolio page to show off your work. Click on “add new page”, give the page a title of “Portfolio” (or whatever you choose to call the page), and select the “portfolio” template.

Now we want to set the “Home” page to be displayed when someone visits yoursite.com (your own domain name, of course). Click on “Settings” in the left sidebar and then click on “Reading”.

Then check the radio button to display a static page as your front page, and select “Home” from the dropdown. For the dropdown that says “Posts page”, select your “Blog” page. That will show your most recent posts on the page that you created and titled “Blog”. Then click “save changes”

You can also add whatever additional pages you like. All you have to do is click on “add new page” under “Pages” in the left sidebar, and then title your page and add content. You don’t need to add pages for your photo portfolio, we’ll create image galleries in an upcoming step. Examples of pages that you might want to create would be an “About” page, a “Services” page, or a “Contact” page.
Customizing the Logo
Of course, you’ll want your website to feature your own logo. If you have a logo file ready (we recommend .png format) you can easily upload it through the theme options dashboard and it will be applied to the header of all pages on your site. The logo file should be no larger than 300 pixels wide and 110 pixels high. Larger sizes will cause issues with the layout.
The logo options are located directly below the color scheme options in the general settings of the theme options.

When you are done, click “save changes” and your logo should be appearing on your website.
Homepage Slideshow
The homepage of this theme features a full-screen slideshow that allows you to add your own images, and you can link each image to any page if you’d like.
To add items to the slideshow click on “Slides” in the left sidebar of the WordPress dashboard.

Click on “add new slide”.

Now a page will open for you to enter the slide. Give it a title (for admin purposes only, the title will not be visible on the site), and click on “set featured image” in the right sidebar.

This will open a window that allows you to insert your image for the slideshow. You can either upload the image from your hard drive by clicking “select files” or click on the “From URL” tab if the image is already online and you can enter the URL for the file.

Because the image you are uploading will be shown in a large size, it is best to upload a high resolution image, otherwise the quality may be poor when the size is increased to fill the screen. The specifics will vary from one image to the next, but in general we recommend around 1000 pixels in width.You can use any image editor like Photoshop, or a free option like the online version of Photoshop to re-size and crop your images.
Select “full size” and then click “use as featured image”.

Then close out of the window or click “save changes”. When you are done click “publish”.

Repeat this process to add several slides. Now, in order to get your slideshow working you will need to specify a transition effect. From the WordPress dashboard, click on “Theme Options” at the left side of the screen. Then click on “Slideshow Options.” Here you’ll see a drop down menu to choose an effect. Number 1 will fade from one photo to the next. Number 2 will drop photos in from the top. Number 3 will slide photos in from the right. Number 4 will push photos in from the bottom. Number 5 will push photos in from the left. Choose an effect (you can change it at any time) and click “save changes”. Once you do that, your slideshow will be active.

You now have a working slideshow on your homepage!
Adding Content
You can add new content to your website any time you need to. We’ve already gone over the process of creating a few of the key pages, but you can create new pages at any time by clicking on “Pages” and “Add New Page”.

Adding Blog Posts
Your website can include a blog if you’d like. To create a blog post click on “Posts” and “Add New”.

Entering a blog post is very similar to entering the content of a page. You’ll give it a title and enter the text. In addition, you can also create categories to help organize your blog posts. In the right sidebar click on “Add New Category” and enter a category name.

You’ll also want to give your blog posts a featured image, as they will be displayed on the post itself and and on the blog index page. To do so, click on “Set Featured Image” to the right side of the screen.

Then follow the process used earlier to upload and save your featured image. Your featured image will then be show on the blog index (as shown below) and at the top of the blog post.

Adding Photos and Galleries
You can add as many photos and as many categories as you want (assuming your host allows enough disk space. Check out BlueHost if you need unlimited space). Adding photos is easy. From the WordPress dashboard, click on “Photographs” and then click on “add new photograph”.

You’ll want to give your photo a title (for admin purposes) and then click on “set featured image”.

Next, click on “choose file”.

You’ll now browse your computer and find the photo that you want to upload. After selecting the photo click on the “upload” button and you’ll see the following screen:

Make sure “Full Size” is checked and then click “Use as featured image”. Close out of that box and you should see a screen like this, with your image in the lower right. Click “publish” when you are done.

Adding photos is as easy as that.
Adding Galleries
Now that you know how to add a photo, we can set up several galleries. Galleries are basically categories of photos. For our demo we’ll set up several galleries, but we’ll show the first one. Click on “Galleries”. You’ll then see a spot that says “add new gallery”. Give your gallery a name, our example is “Landscapes”. You’ll then also enter a slug. The slug will be used in the URL of the gallery. If your gallery title is one word we recommend simply using the word in all lowercase letters, such as “landscapes”. If you gallery title is more than one word, we recommend using hyphens instead of spaces between each word.

As you are adding more categories you may or may not want to use parent and child galleries. When you add a new gallery you have the option of setting a parent. An example of the parent-child relationship would be if we were going to add separate galleries under landscapes for different regions or states. So if we were creating a gallery called “Yosemite Landscapes” we could set the parent gallery to be landscapes.
If you want to designate a photo that you have already uploaded to be in a particular gallery, click on “Photographs”, where you will see a list of the photos that you have uploaded.

Then click on the photo’s title and the edit screen will come up. From here you can select a gallery to the right side of the screen. You can add it to multiple galleries if appropriate. You can also create new galleries from this screen.

When you’re done, click the “update” button to save the changes.
Going forward, you can just assign photos to galleries whenever you upload them.
The Navigation Menu
One of the most important elements of your website is the navigation menu because it has a big impact on the usability of the site and allowing visitors to find the content that they want. You have full control over the links that are included in your navigation menu (the same menu will be used on all pages of the site). Please note: If you don’t do this step, the theme by default will include a menu with all of your pages.
From the WordPress dashboard click on “Appearance” and “Menus”.

Enter the name “Header” for your menu and click “Create Menu”.

Then select your “Header” menu in the dropdown for “Main Navigation Menu” (this step is needed in order to apply your custom menu to the site’s header).

Now move down a little lower on the page and you’ll see a list of all the pages that you have published. Check the box next to each page that you would like to add to the menu and click the “Add to Menu” button.

After clicking “Add to Menu” the pages that you have added will appear in a list at the center of your screen.

Next, we’ll also add some links to our galleries. Below the list of pages (to the left) you’ll see a list of the galleries. Check the boxes for each category that you would like to add to your nav menu, then click “Add to Menu”.

Please note, if you are not seeing the option to add your galleries to the menu, look to the top right of the screen and click on “Screen Options”. Then check the box for “gallery”.
Your menu should now list all of the pages and galleries that you have checked.

You can drag items up or down to change the order in which they are displayed (to drag, click and hold the mouse button while moving the mouse up or down). If you want to make certain links appear in a dropdown menu, move the item slightly to the right. For example, we want the child landscape galleries under the parent landscape gallery. This will place them in a drop down menu under “Landscapes”, so we will move them slightly to the right under “Landscapes”.

When you’re done click “Save Menu” and the changes will be applied. Now you can check your site and see the menu in action.


